Always be sure to update the Evergreen Content Poster to the latest version. This way you’re sure to have the latest and greatest features and any known issues are resolved.
To update the plugin to the latest version you can either do this automatically or manually.
How to update the Evergreen Content Poster from the WordPress dashboard.
Before we get into the manual way to update the plugin, most of the time you probably just want to do this automatically.
We’ll keep it brief because you’re probably already familiar with this method of updating a WordPress plugin. All you do is head to the Plugins tab in your WordPress dashboard, see a notice that the Evergreen Content Poster is out of date, and click the Update Now button to automatically update the plugin:

WordPress then automatically grabs the latest version and installs it for you – no more manual input required.
How to manually update the Evergreen Content Poster from the WordPress dashboard, via SFTP or FTP
Some people don’t like to automatically update a plugin on their WordPress installation. No worries there are also two different ways to manually update the Evergreen Content Poster.
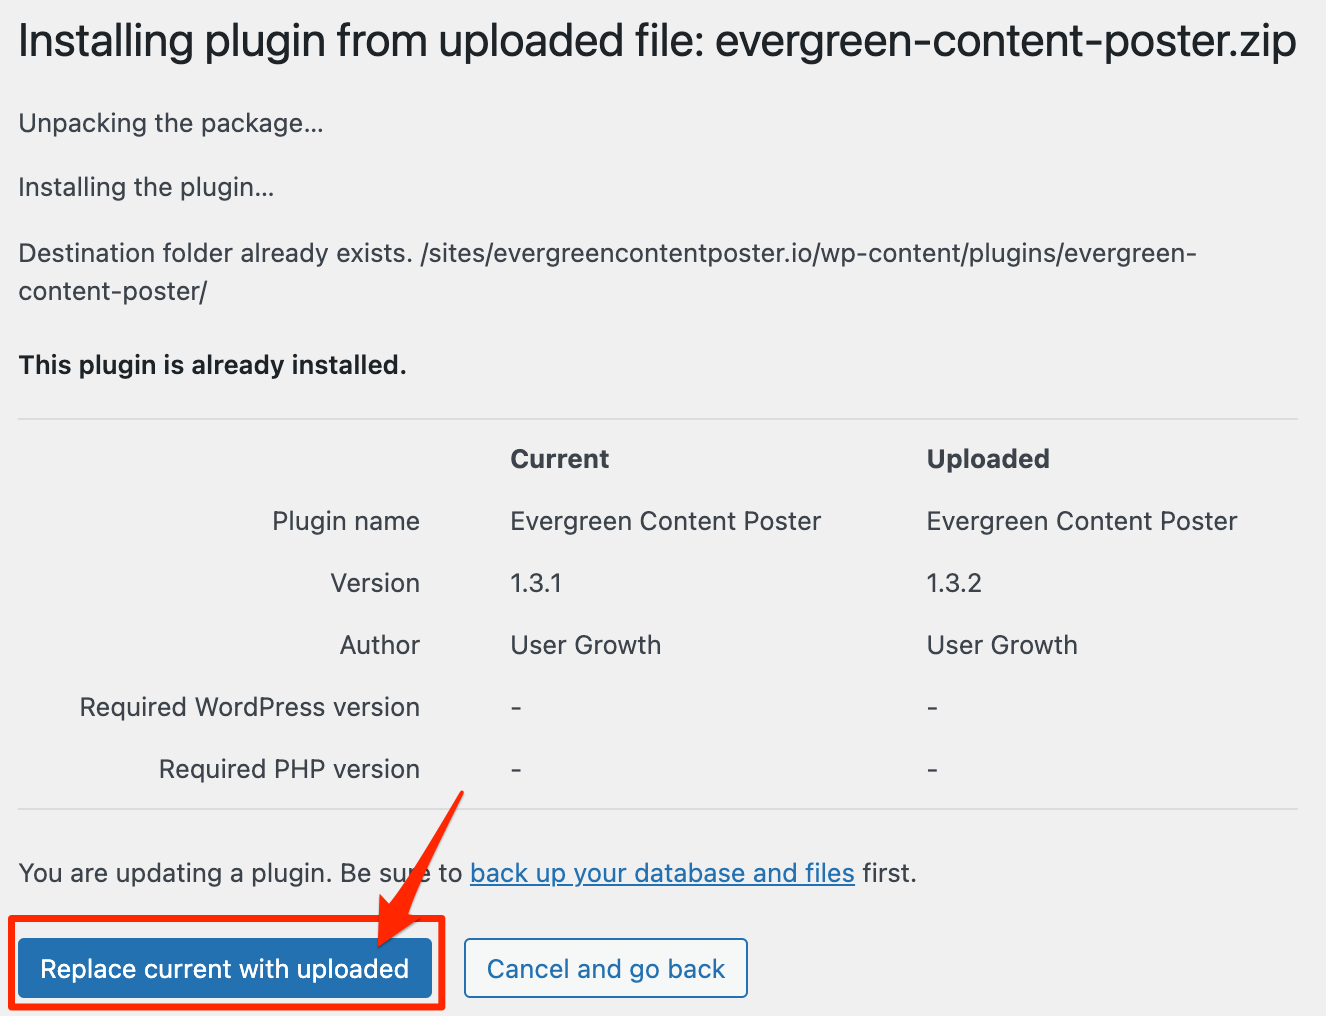
The first way is still using the WordPress dashboard. Download the latest evergreen-content-poster.zipfrom the WordPress repository to your computer. Then head over to the Plugins > Add New > Upload Plugin. When you upload the plugin it will give a warning “this plugin is already installed”. Choice the option “Replace current with uploaded”

Alternatively, you can also update the plugin via SFTP or FTP.
To get started with this method, you’ll need some tools and pieces of information:
- An (S)FTP program. This allows you to connect to your site via (S)FTP. Filezilla or Cyberduck are both great free options, but you can choose whichever program you prefer.
- Your SFTP details. If you don’t have these at hand, contact your host to get these details.
Once you have this information, open up your (S)FTP program of choice and connect to your website. There are a bunch of things it might ask before you can make the connection:
- Host – this will be most likely the domain of your website, or in some cases, it will be ftp.yourgroovydomain.com
- Username – Get these details from your hosting provider
- Password – Get these details from your hosting provider
- Port – You can probably leave these as default, otherwise, your hosting provider will indicate if you need to use a different port
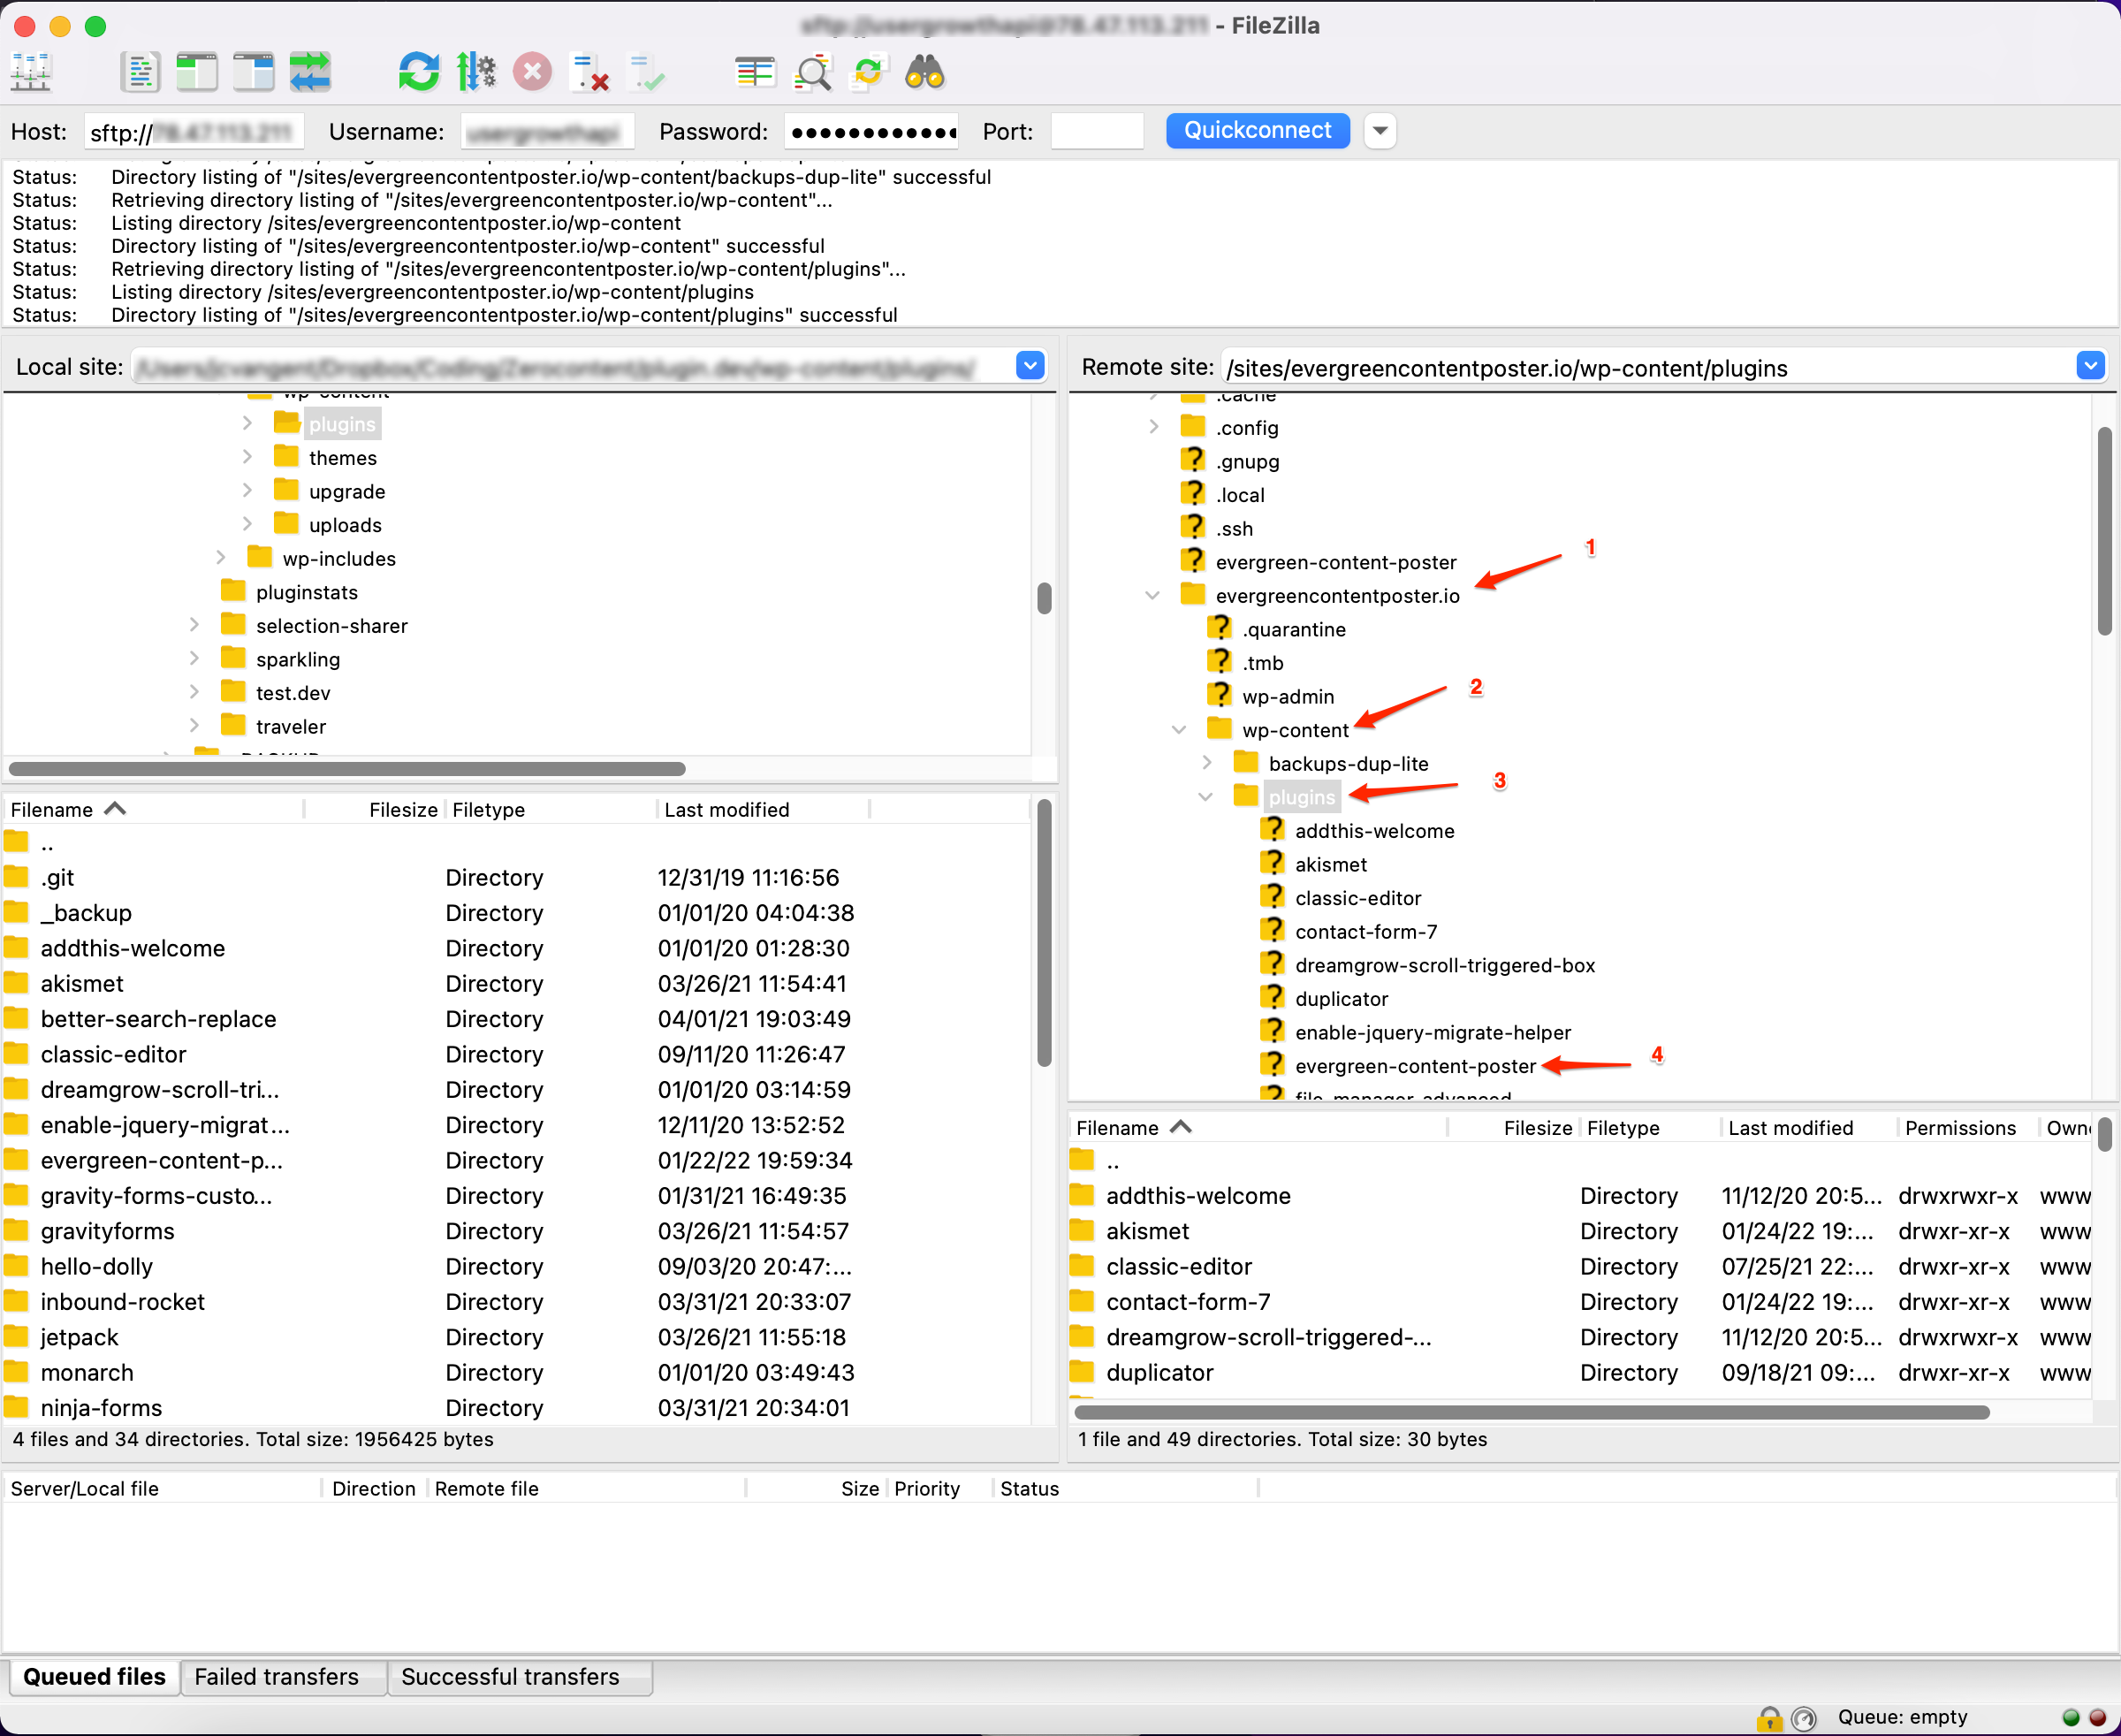
Once you’re connected via (S)FTP, use the folder structure in the Remote Site tab to navigate to your plugins folder. Plugins are located in the wp-content/plugins folder of your website’s main folder.

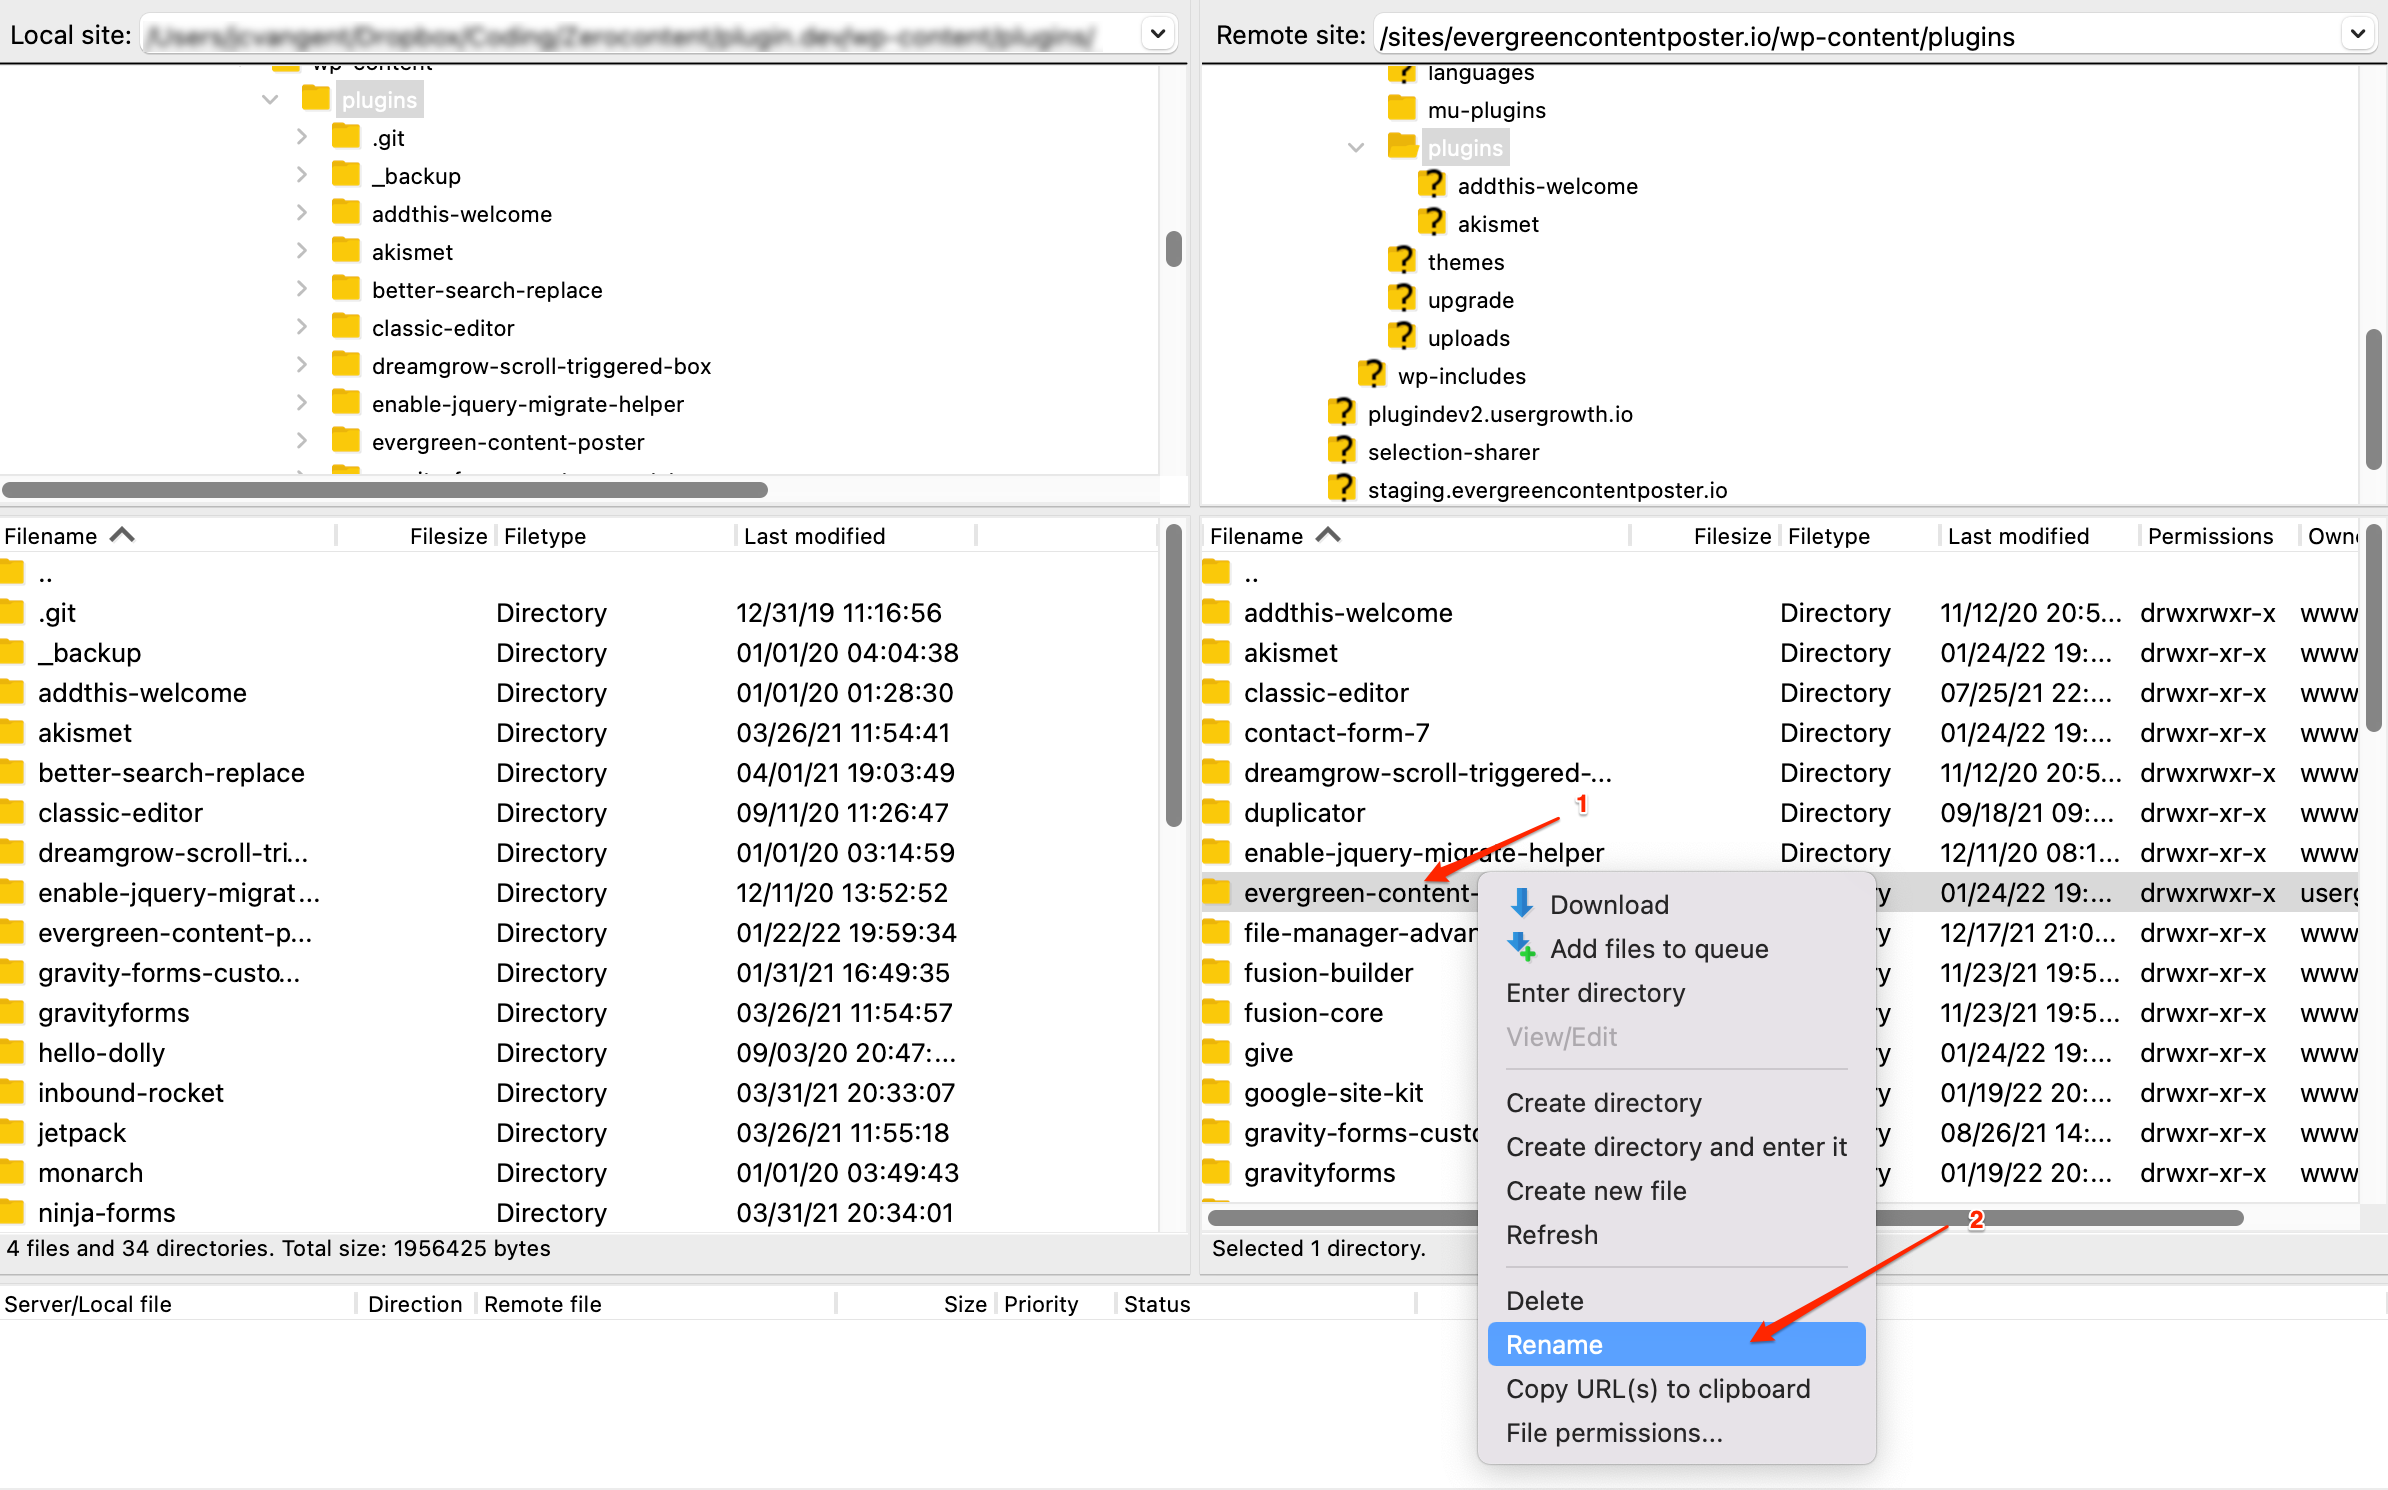
Then, rename the folder for the plugin you want to update by right-clicking on it (1) and choosing Rename (2). For example, if you want to update the add-from-server plugin, you’d right-click and rename it add-from-server-old:

While you can always just delete the old plugin right away – renaming it ensures that you still have the files readily available in case something goes wrong. Once you verify everything works, you will need to delete the old version, though.
Upload the Latest Version of Your Plugin
Once the folder is renamed, you need to download the most recent version of the Evergreen Content Poster.
Then, use a tool to open the .zip file you downloaded and extract the folder inside:

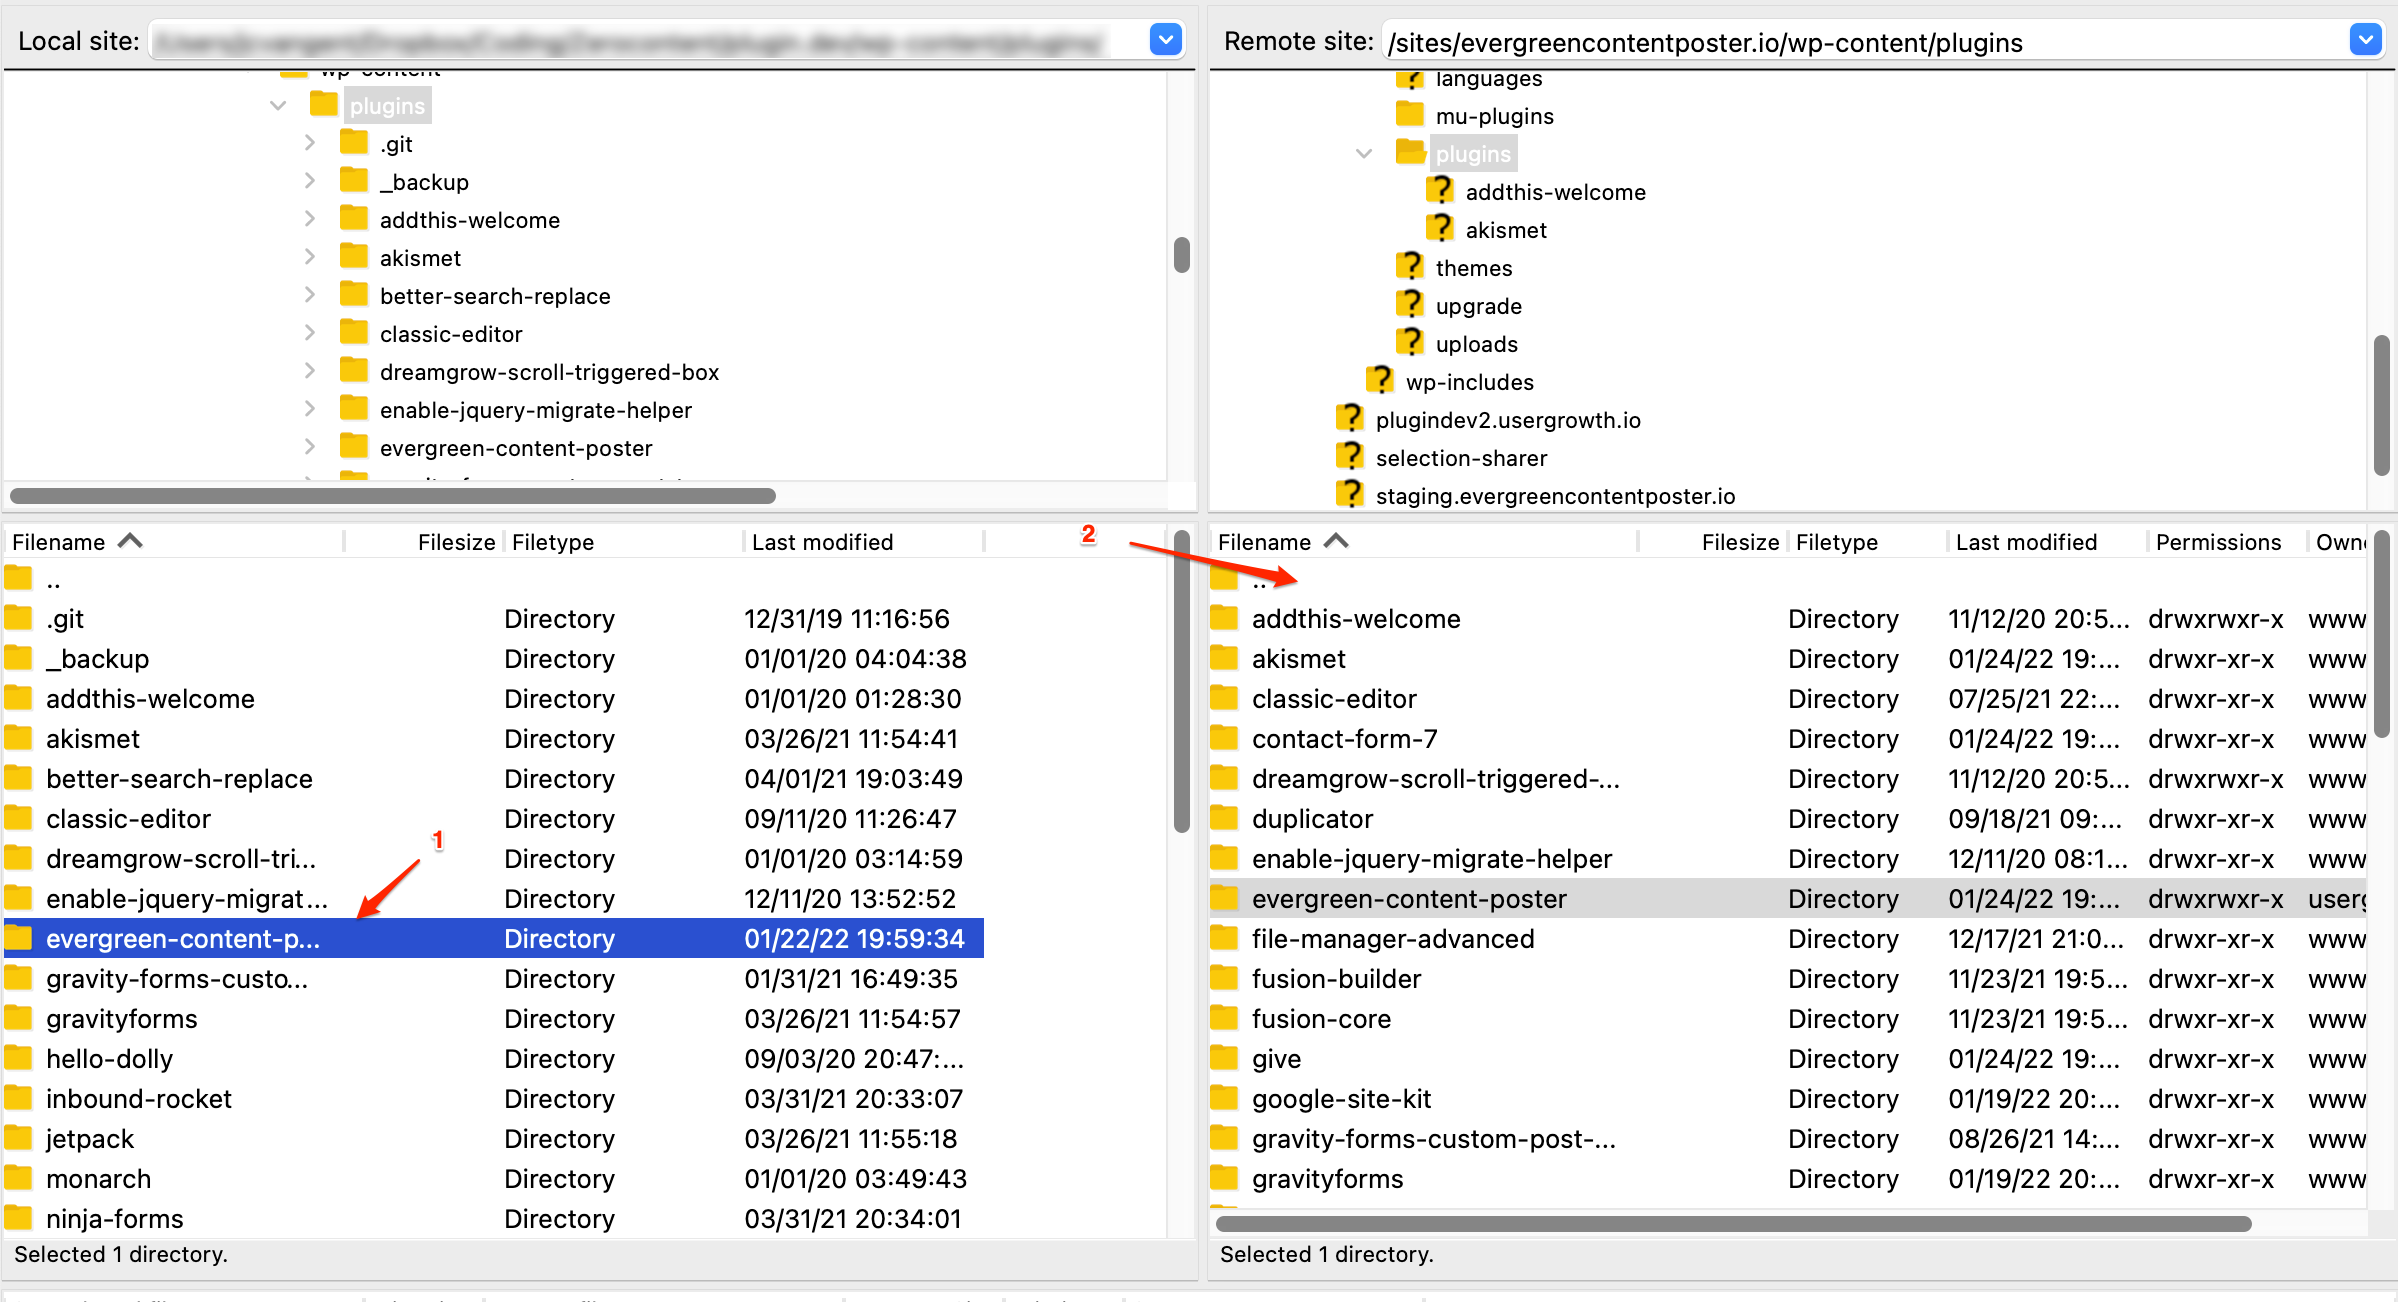
Then, find the extracted folder in the Local Site (1) tab of your FTP program and upload it to the plugins folder on your server (2):

Once the file upload completes, your plugin should be updated to the latest version. You can verify this by going to the Plugins tab in your WordPress dashboard:

Make sure to double-check that the plugin is still activated (it should be). Then, as long as you don’t see any bugs, you should go ahead and delete the old folder from your server using your FTP program.
Note – until you delete the old folder, you might see the plugin listed twice in your Plugins tab. That’s normal and will go away once you delete the old folder.
Now, the Evergreen Content Poster is 100% up to date! And because nothing that you did has any effect on the WordPress database, all of your plugin’s settings should remain intact after the update process.


Leave a Reply